If you upgraded to Windows 10 and don’t like it, going back to your previous version of Windows is actually quite easy.
So you’ve upgraded to Windows 10. Annnd you don’t really care for it. Perhaps you didn’t even mean to upgrade and it seemingly just happened on it’s own. Never fear! because going back to your previous version of Windows, be it 7 or 8.1 is actually very easy. In this article, we’ll go over how to make the jump back to the Windows you’re familiar with.
It’s important to note here that you have 30 days after the upgrade to Windows 10 in which you can go back to your previous version of Windows using this method. After the 30 days has expired, you will be out of luck and need to perform a full reinstall using an installation DVD.
First Things First
Before we dive into uninstalling Windows 10, there are a few little housekeeping things we need to get out of the way. The first of which being your anti-virus software. Several AV softwares from different vendors don’t always handle the transition to Windows 10 or back again very well. As a result, the best course of action is to simply uninstall that software before reverting back. This will help prevent problems such as crashes, lack of network/Internet connectivity, and and other potential nasty side effects.
Second. While the uninstall process is usually harmless it’s always a good idea to back up important files from your machine. The last thing you want is a situation where an uninstall process goes haywire and you find yourself losing data that is important to you. Remember, backing up should be considered almost as important as breathing.
On to the Procedure…
Now that we’ve gotten those things out of the way, it’s time to actually uninstall Windows 10 and go back to your previous system.
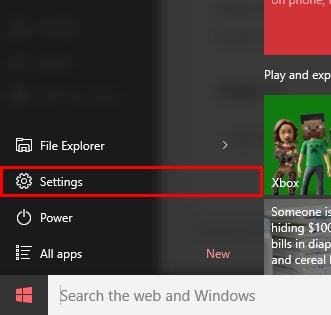
Step 1:
Open up the Windows 10 Start Menu and click on Settings.
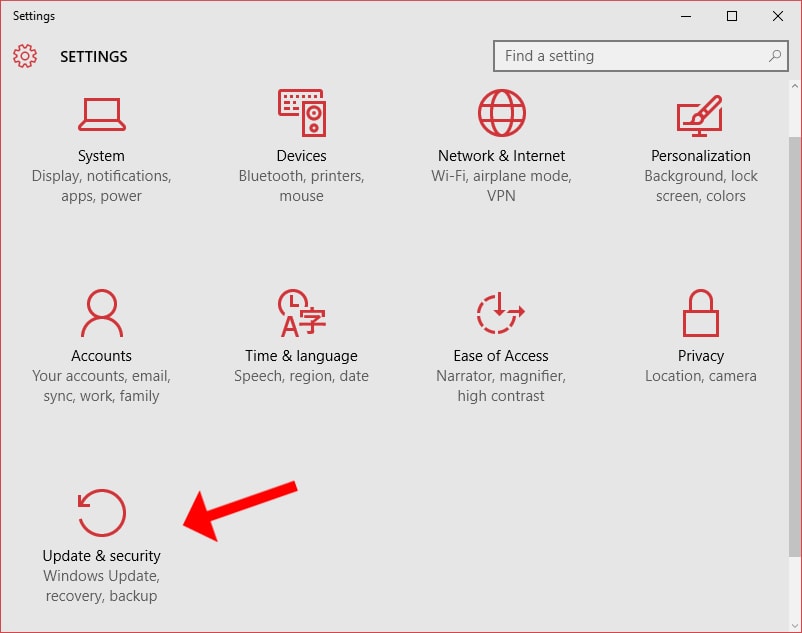
Step 2:
In the Settings menu, click on Update & security. You may have to scroll down a little to see it.
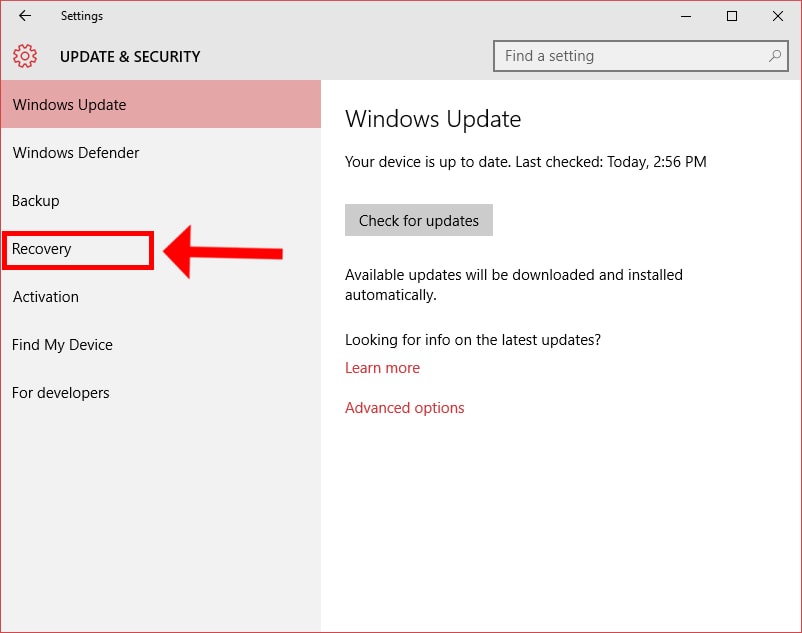
Step 3:
Once there, click on Recovery in the left-hand column.
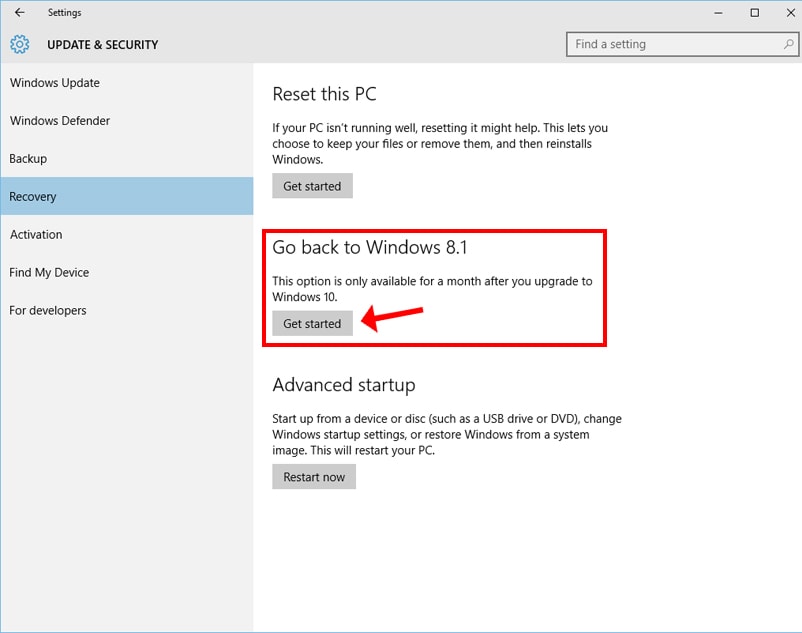
Step 4:
Finally, you should see an option to Go back to Windows X where X is the version you were previously using. Click on the Get started button underneath this heading to start the uninstall process.
Step 5:
You’re almost home. You will be presented with a few more prompts asking if you’ve tried the latest updates and if there’s anything you want to let Microsoft know about why you’re uninstalling. You can bypass these prompts if desired and once done with that, you will be prompted to restart your computer. Once you click restart, your computer will reboot and work on reverting you back to your previous version of Windows.
Step 6:
That’s it! If everything went well you should find yourself back to the Windows you know and love after a short time. At this point you can reinstall any security software you uninstalled previously and continue on with your day.